Hi folks! Jen and I just got back from WorkBench Con in Atlanta. This year we had a booth and helped makers, providing free one-on-one sketchup tutorials.
We wanted our booth to represent who we are, and knew settling for the black curtains and folding table wouldn’t cut it.
But we only had a day to buy all the materials, haul all the materials into the venue, and build the booth – all with a baby present. So we spent quite a bit of time planning and figuring out how to build a booth the quickest and easiest way – all while not spending a ton of money.
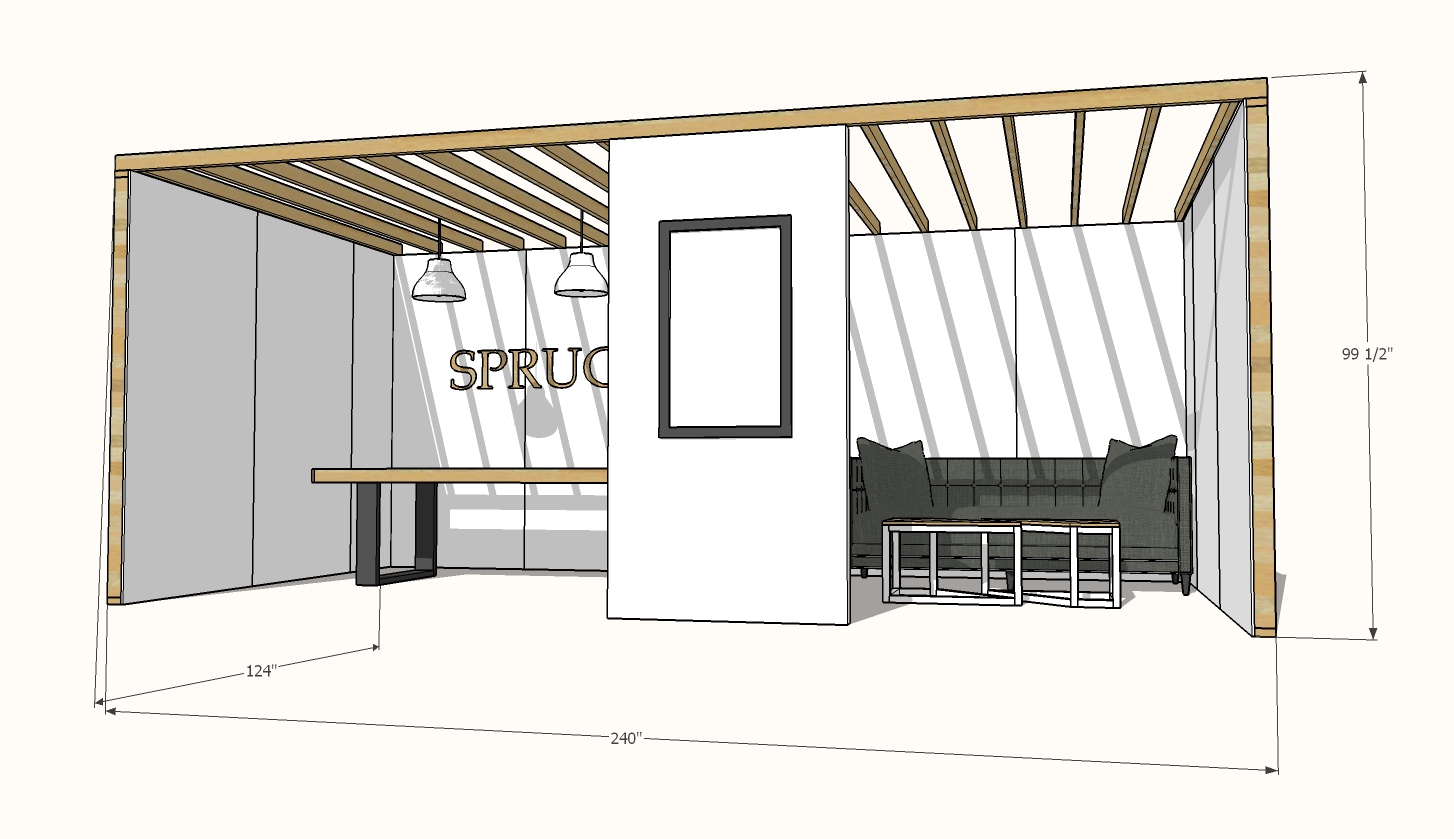
So here’s the plan –
Here’s us building it –
<iframe width=”560″ height=”315″ src=”https://www.youtube.com/embed/YhfV333UWZ8″ frameborder=”0″ allow=”accelerometer; autoplay; encrypted-media; gyroscope; picture-in-picture” allowfullscreen></iframe>
And here’s how it turned out –
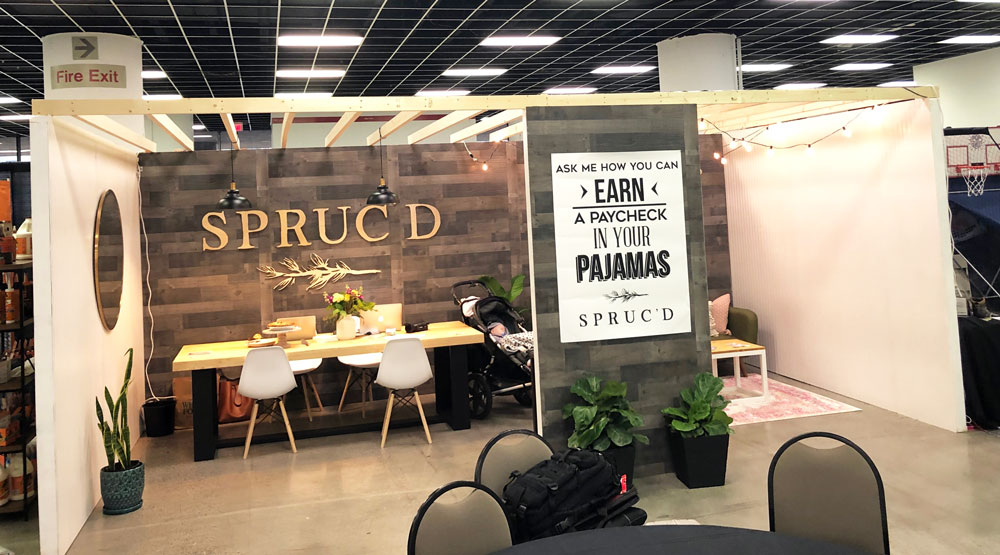
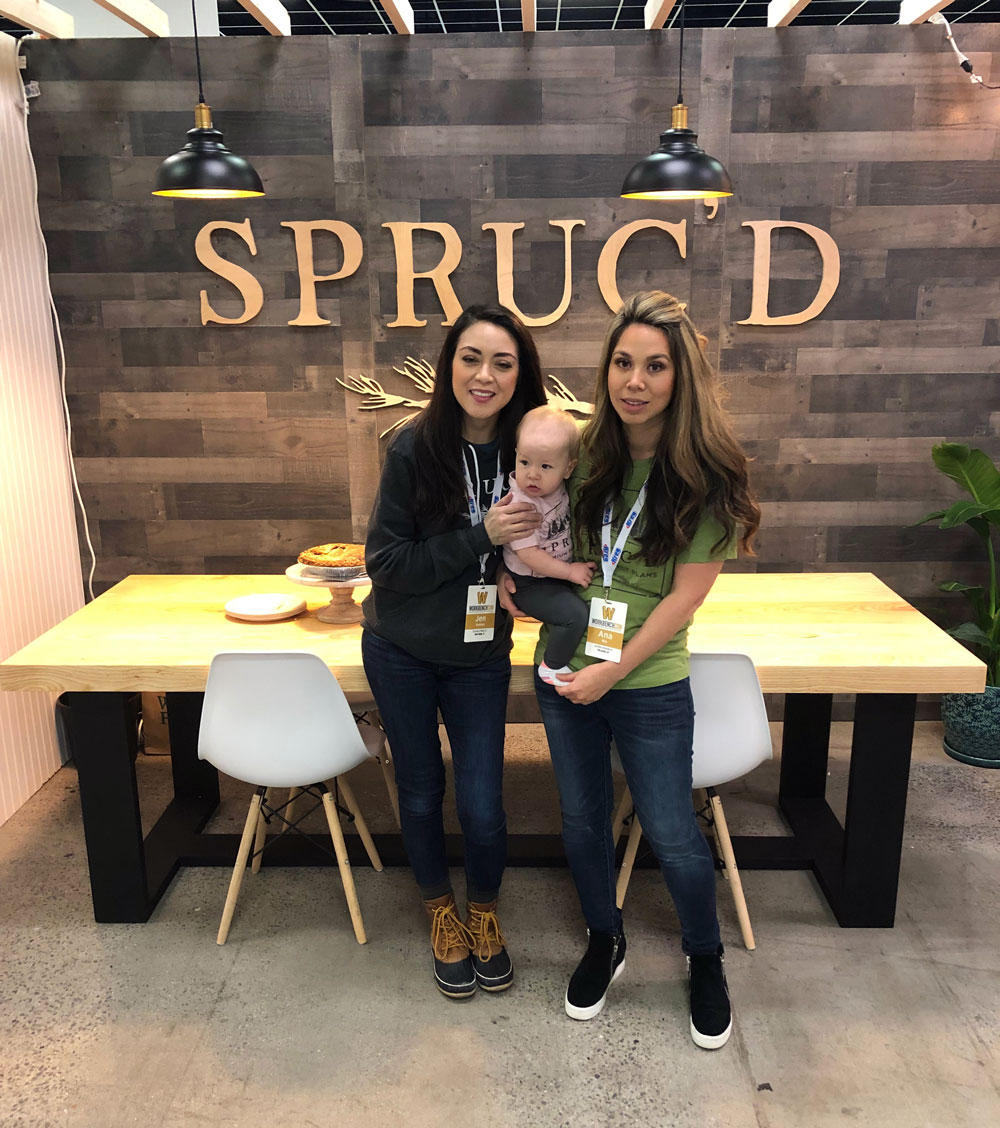

Spruc’d Trade Show Booth Design
- 2x4s and paneling to construct a 10×20 booth
- Work with materials to minimize cutting
- Screw everything together to minimize tools and make break down easier
- Add a 2×4 roof so we can bring in lighting and make the booth feel enclosed
Here’s how we built the Trade Show Booth:
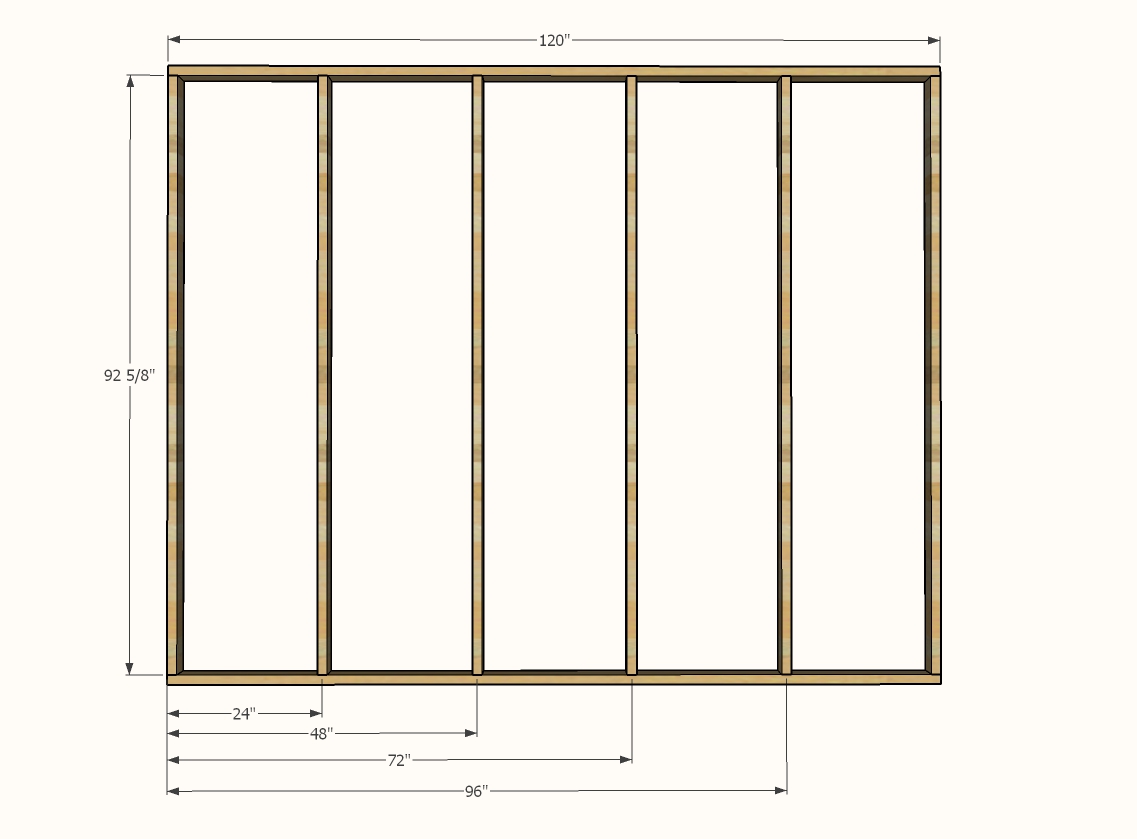
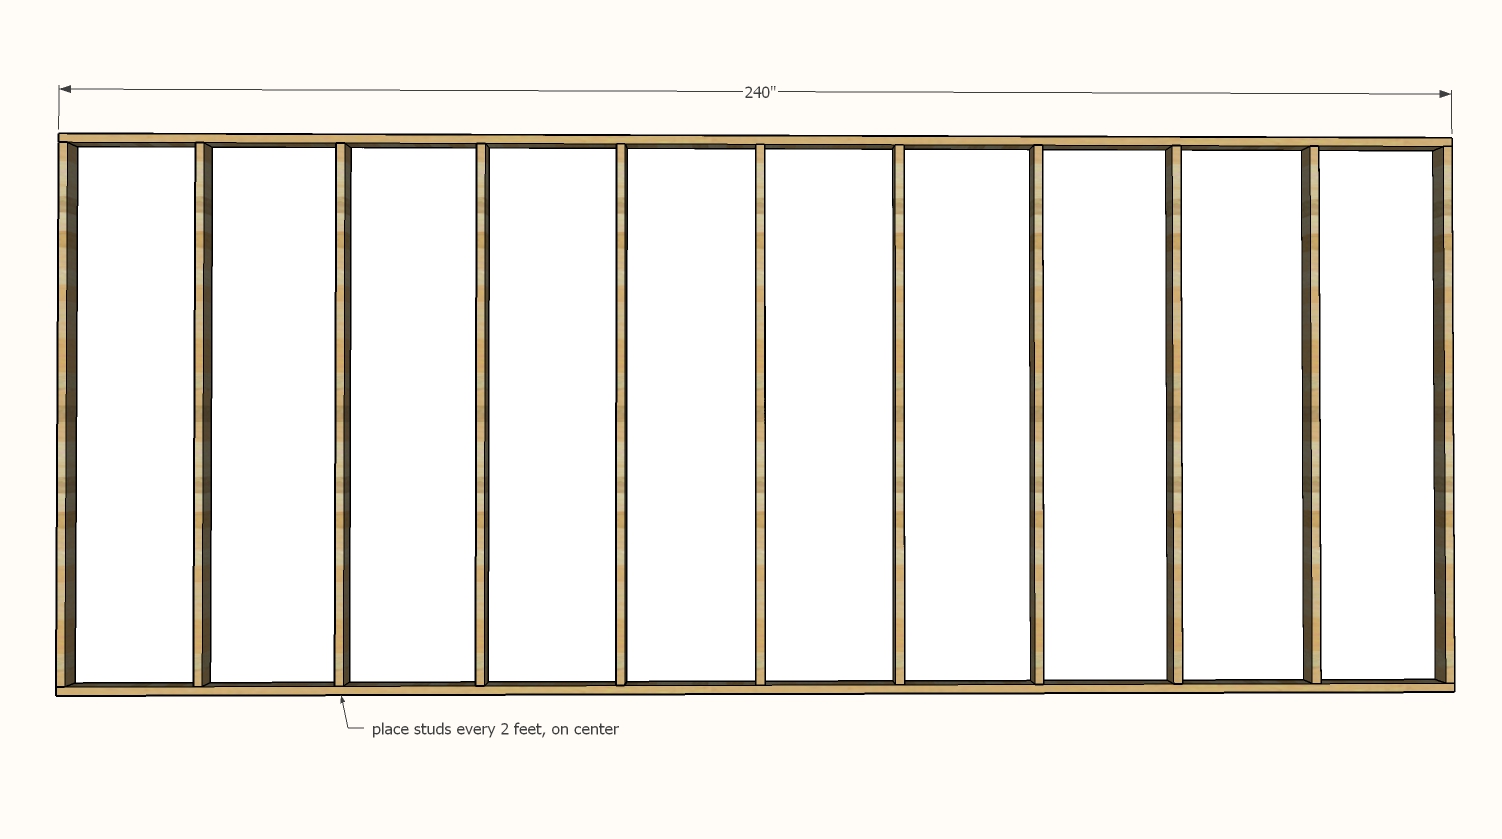
We framed up FOUR walls, all 10 feet long (using 10′ 2x4s) using 2×4 studs (92-5/8″ long), placing the studs so the center of the stud are on 2 foot centers. We screwed everything together with 3″ self tapping screws. NOTE: Measure the 2x4x10s to make sure they are 10 feet long. If not, cut to fit.
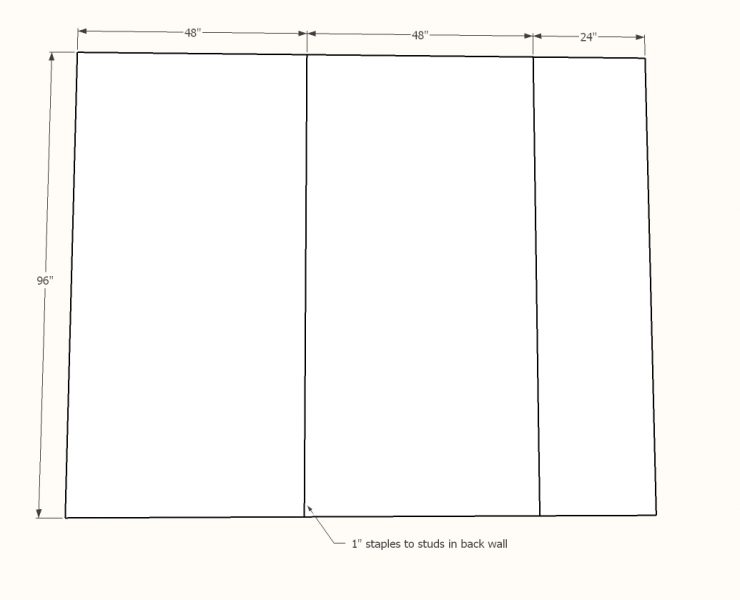
On two of the walls, we added paneling – two full sheets and a half sheet. We stapled the paneling on with 1″ narrow crown staples.
For the back wall, we took the remaining two 10′ framed wall sections and we screwed them together to make a 20′ long wall. Then we stapled paneling to the front of the entire now 20′ long wall.
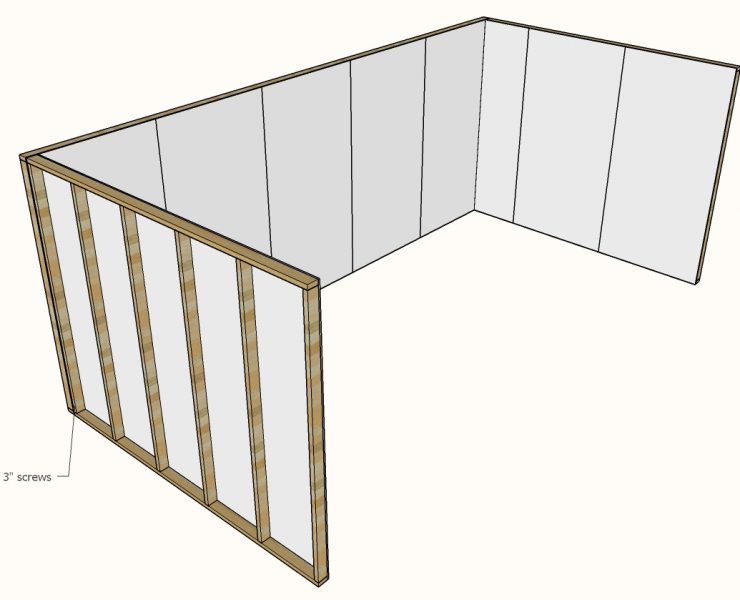
Then we stood the back wall up, and screwed the side walls to the back wall with 3″ screws.
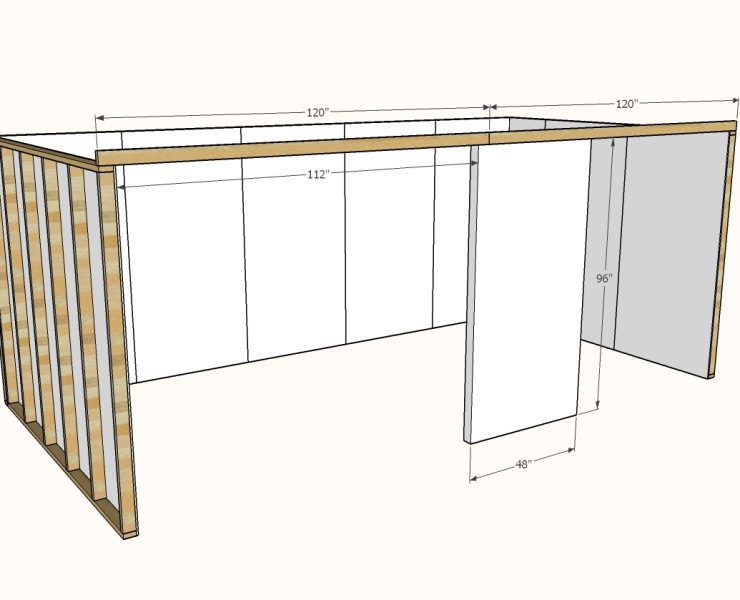
We built a four foot wide wall, and stapled paneling to the front and back. Then we tied the two side walls into the four foot wall with two 10 foot 2x4s. We had to screw at an angle to attach the 2×4 top to the four foot wall. 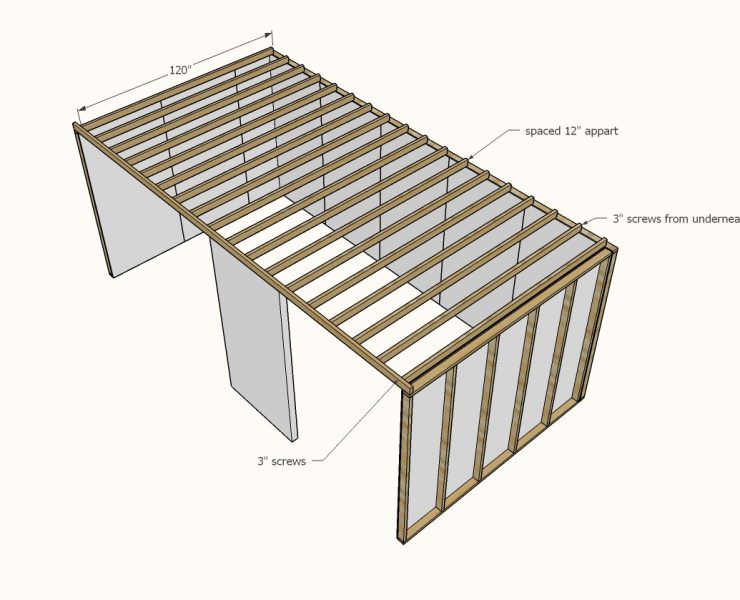
From there, we just attached 2x4x10 on top. This really tied everything together, both visually and structurally. You will not need to cut the 2x4x10s to exact size – any excess can just hang off the back.
Here’s the shopping list:
- 12 sheets of 4×8 paneling
- 27 2×4 studs (92-5/8″ long)
- 28 2x4x10
- 3″ screws, self tapping (2 pound box)
- 1″ narrow crown staples
- Narrow crown stapler
- Drill and Drill Bits
- Tape Measure, Square, Safety Glasses
What did you do with the booth afterwards? And where is the table story you mentioned on your Ana-White.com video? Thanks!
Hi Christal,
We donated the booth materials to Habitat for Humanity after the conference. You’ll find the touching story behind the table on @jericho_home’s Instagram page. Hope that helps!