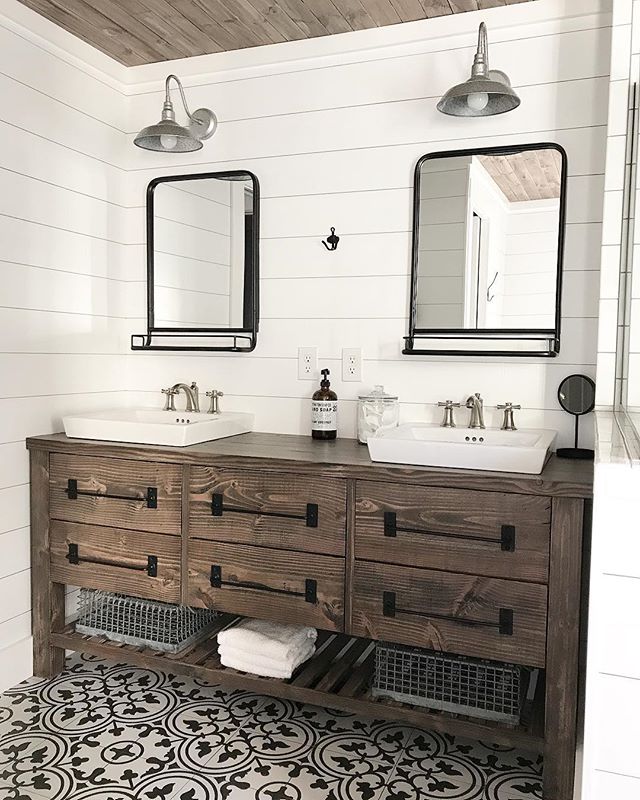
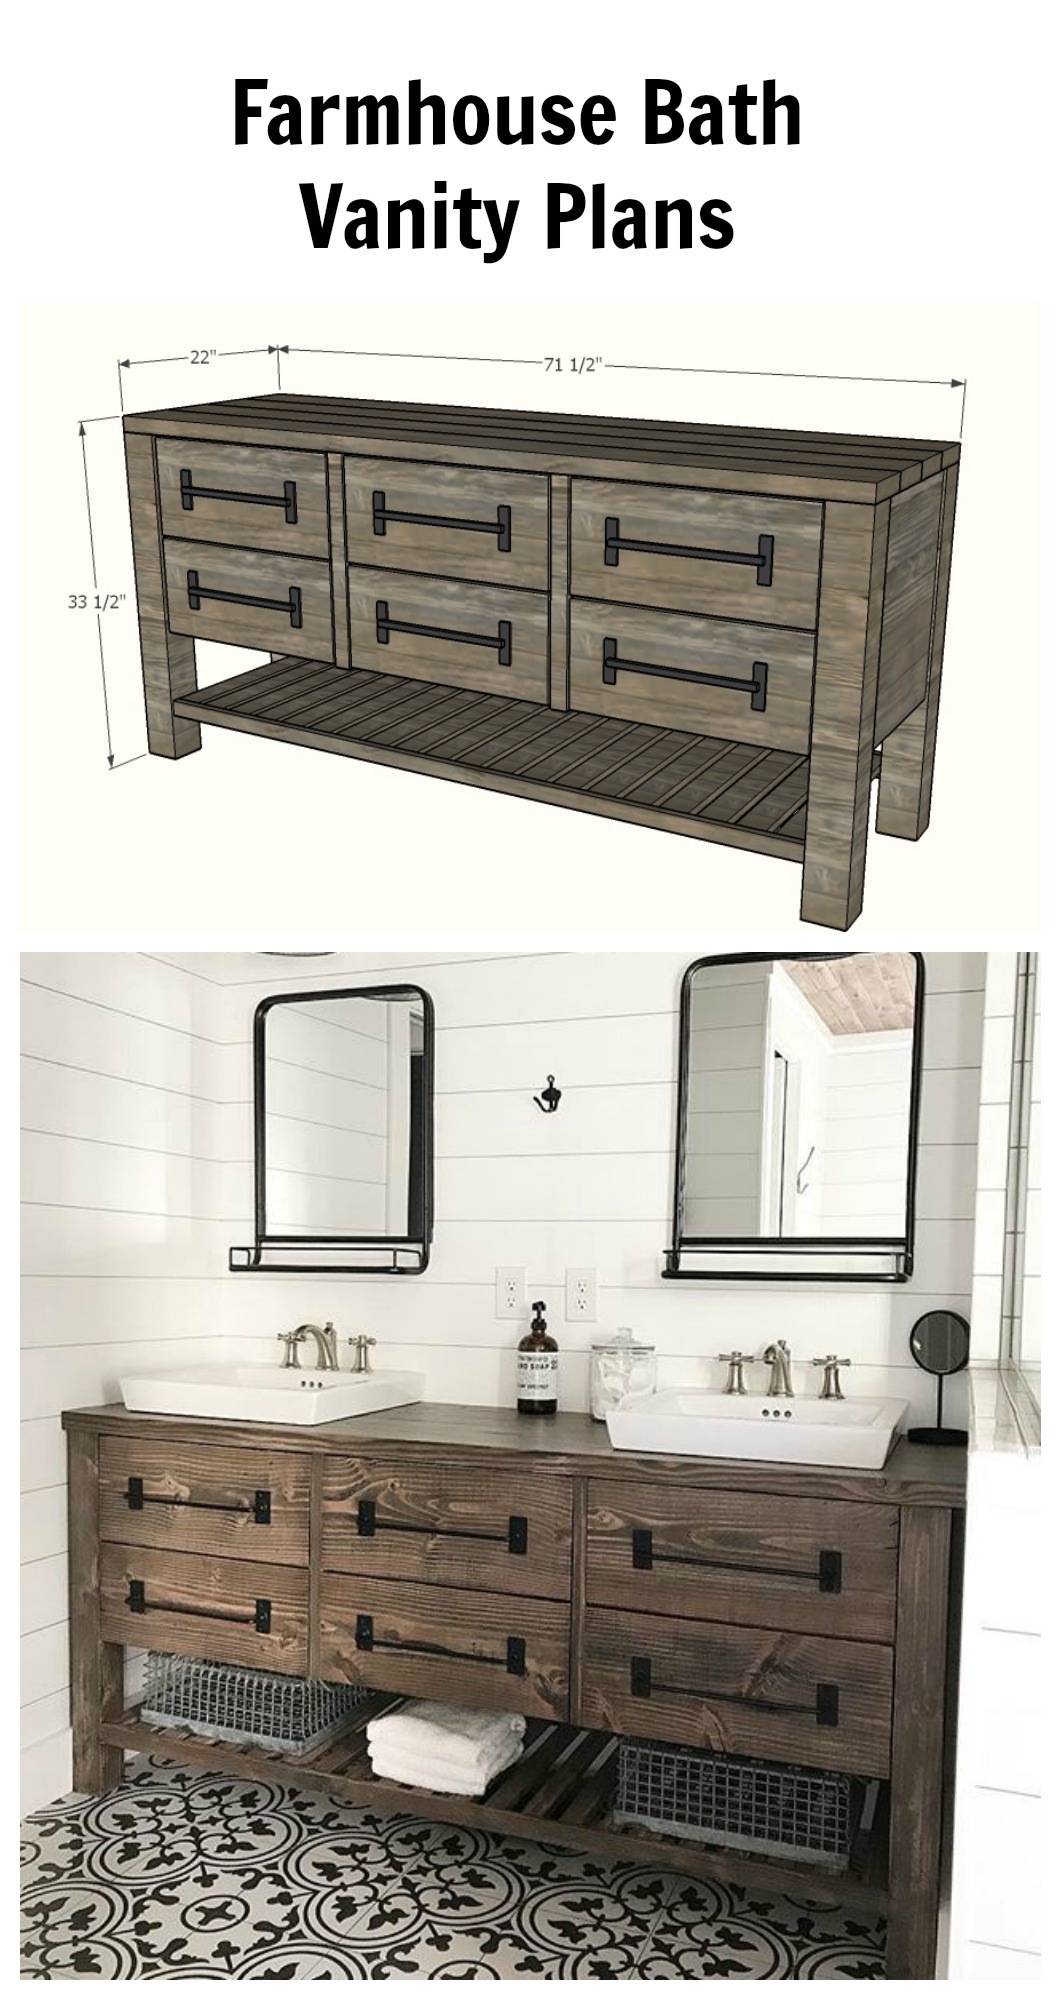
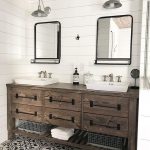
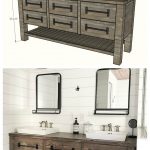

This solid wood, rustic farmhouse style double bath vanity features roomy drawer(s) and an open bottom shelf. Could also be used as a dresser, console, sideboard, or kitchen island.
Plan includes exclusive finishing details.
Plan options are 72″ double or 48″ single or 36″ single vanity.
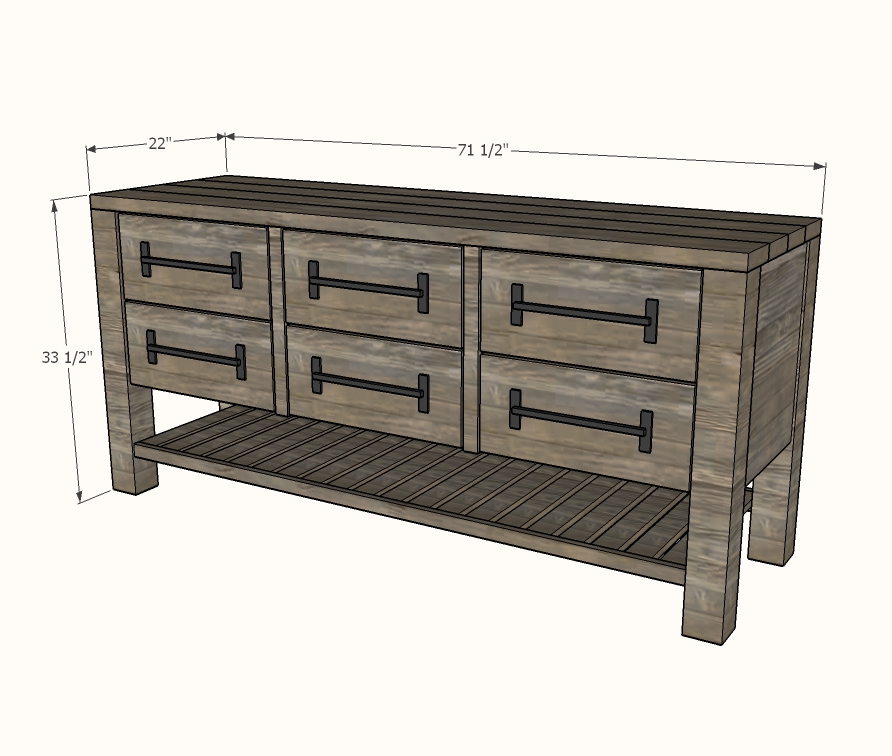
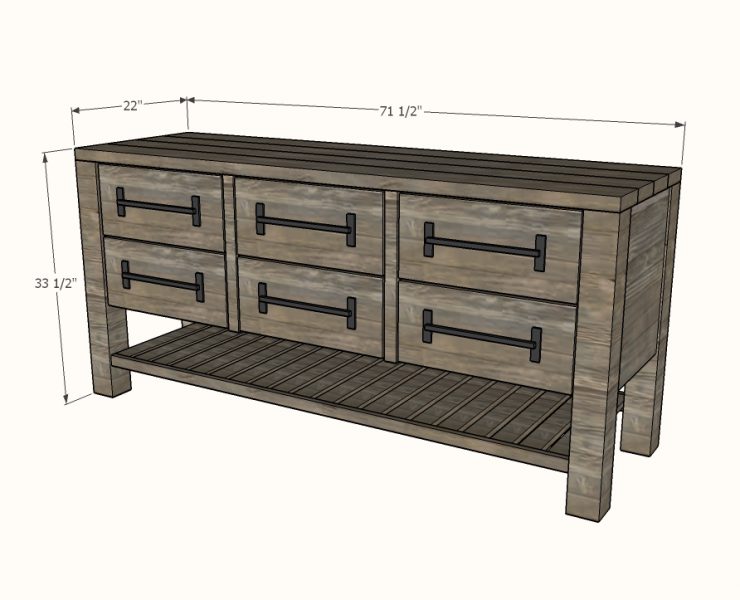
72″ DOUBLE VANITY:
72-Inch Double Vanity Dimensions: 71-1/2″ wide, 33-1/2″ tall, 22″ deep.
This is a 17-page PDF plan with full step-by-step diagrams, shopping list, recommended tools, cut list, and finishing details.
This plan does not include plumbing or installation instructions.
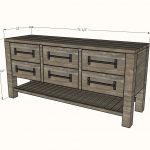
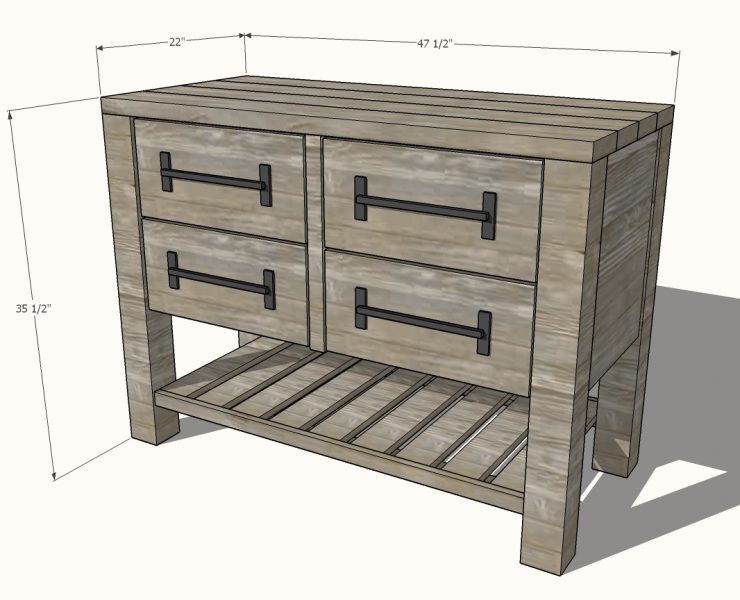
 48″ SINGLE VANITY:
48″ Single Vanity Dimensions: 47-1/2″ wide, 33-1/2″ tall, 22″ deep.
This is a 15-page PDF plan with full step-by-step diagrams, shopping list, recommended tools, cut list, and finishing details.
This plan does not include plumbing or installation instructions.
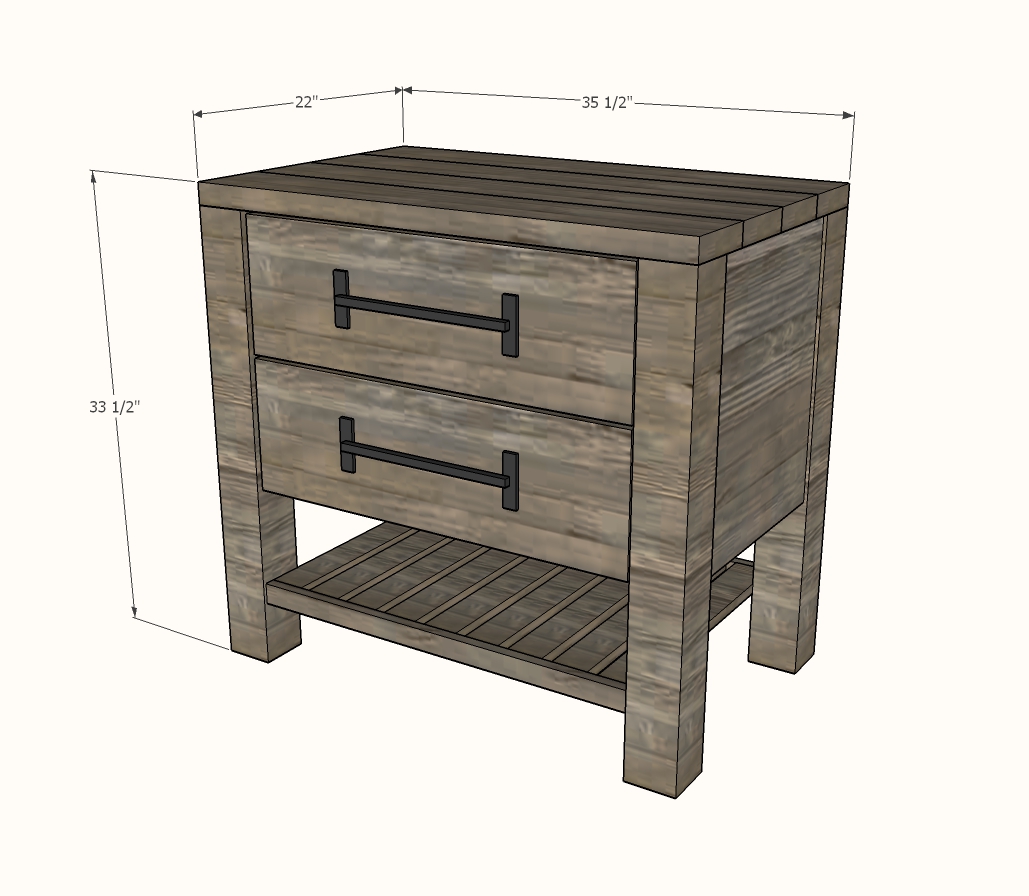
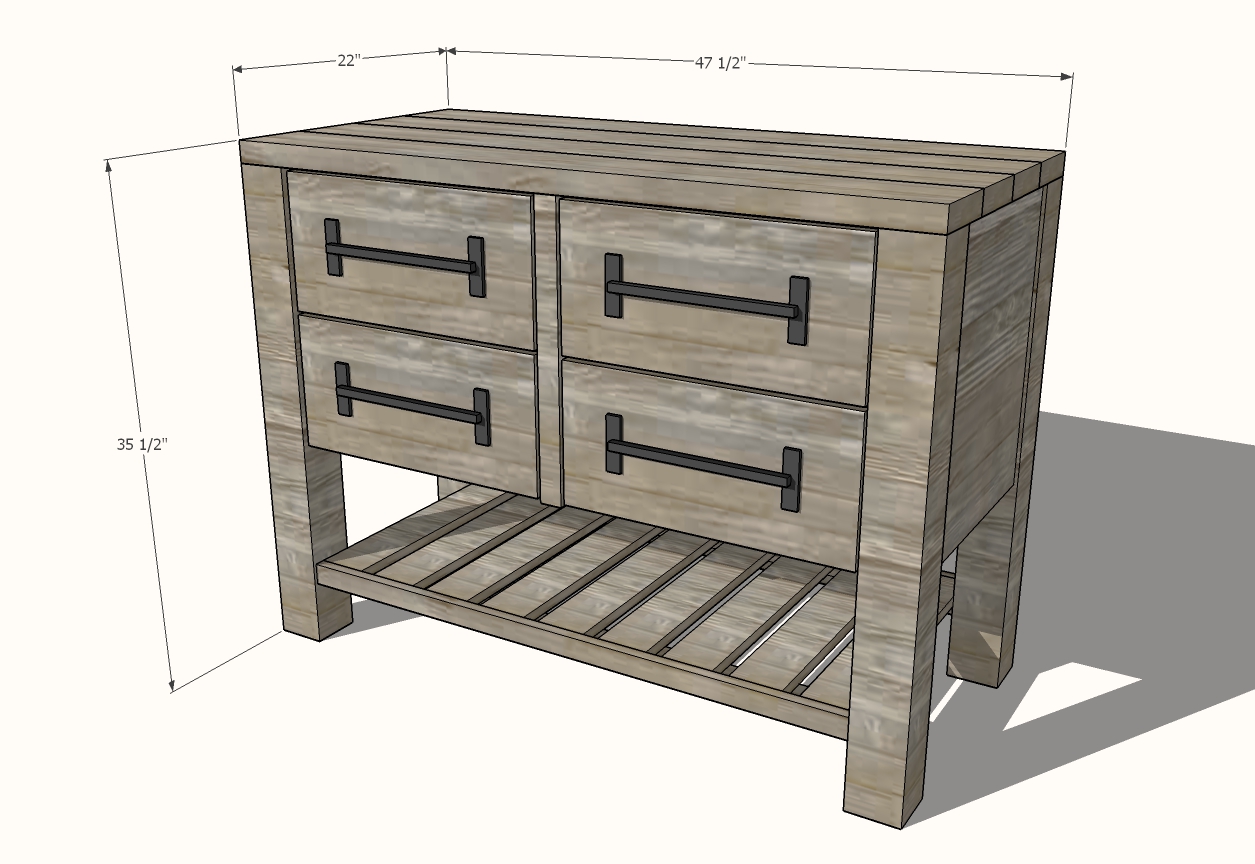
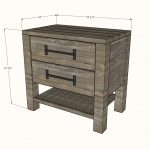
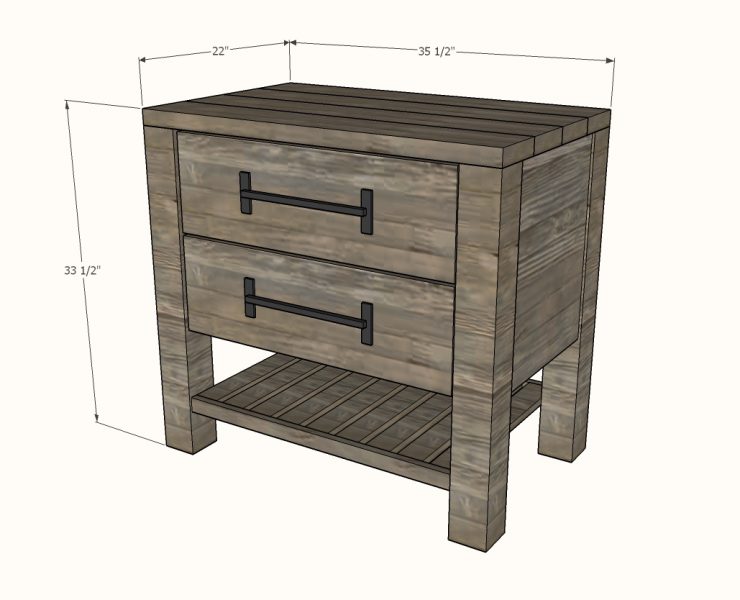
 36″ SINGLE VANITY:
36-Inch Single Vanity Dimensions: 35-1/2″ wide, 33-1/2″ tall, 22″ deep.
This is a 14-page PDF plan with full step-by-step diagrams, shopping list, recommended tools, cut list, and finishing details.
This plan does not include plumbing or installation instructions.
| Recommended Tools | Compound Miter Saw, Kreg Jig, Table Saw or Circular Saw, Drill, Tape Measure, Carpenter's Square, Jigsaw (for cutting sink hole out) |
| Materials | Dimensional lumber, 3/4" and 1/4" plywood panels, Kreg Jig Screws, Brad Nails |
| License | Personal Use Only |
| File Types | PDF file with full dimensions and step by step instructions with diagrams |
Hello! I would like to use the 48″ vanity for a double vanity. Do the plans show this?
Hi Shawn, hopefully you received my email addressing this but to summarize…I don’t have any experience with concrete counters, I’m afraid, so all I can say is that my vanity (the 72′ shown in the images) is strong enough to hold me standing in the middle of it. Not sure how heavy a concrete counter of that size would be but I’m 135lb and that would be my weight all concentrated on a much smaller area rather than spread out over the whole vanity. It’s a sturdy piece, given that it’s built with 4×4 legs. My only concern would be the middle support but as you mention you plan to do the cross beam, I think it will be just fine.
Good luck & hope you enjoy the build!
Hi Angela. I am getting ready to build the vanity and was wondering if this will be able to support a concrete countertop which is significantly more weight than the wood you suggest. I will have a cross beam in the middle top for added support. Let me know what you think and I cannot wait to start building. Thanks. -Shawn
Hi there! I’m almost done but stuck on the step for attaching the top. How was the top attached? Do you have any closeup diagrams or pictures? Did you just drive a screw straight through the bottom and into the top or was there another way? Did you predrill the hole or how did you make sure the wood didn’t split? I am not sure how to use pocketscrews since I don’t see anywhere wide/tall enough to create pocket holes.
Another question – there are some gaps in the top, just small enough for water to seep through despite having done three coats of poly. Did you fill these long gaps somehow, and what did you use? Silicone or caulk or something?
Thank you this project has been really fun and I can’t wait to see the finished product in our bathroom.
Hi Tess,
I’m so sorry for the delay in responding! I somehow missed your comment. I attached my top with pocket screws through the upper frame into the countertop. I didn’t have any gaps in my top but as long as they are small I wouldn’t be overly concerned. I do not let water sit on my counter, despite the multi coats of flat poly. If you intend to leave your counter natural, you probably don’t want to use caulk/silicone because (in my experience) even the clear ones do tend to get discolored over time. Again, my apologies for taking so long to respond. I expect your project is done by now so I hope you are very happy and I’m so glad you had fun with the build! Thanks for your support!
Angela
Where are the mirrors from?
Hi Tim, the pulls are actually a DIY. You can find the info in my IG highlights @angelarose_diyhome under “pulls.
Hi Tanya, the ceiling treatment process and products are linked in my instagram highlights @angelarose_diyhome under “planked ceiling”.
Hi Tanya, the ceiling treatment process and products are linked in my instagram highlights @angelarose_diyhome under “planked ceiling”.